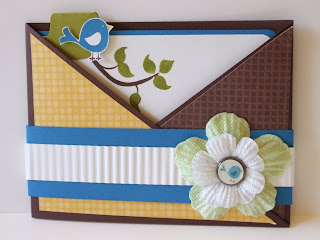
With thanks to Jayne Mercer for sharing this great tutorial how you can make a simple flower from just 3 scallop Circle Punches... I have made this Birthday card for my mother-in-law (well not official, but officially in my books) for her special day tomorrow.

Stamps: Heard from the Heart (mini catalogue)
Ink: Handsome Hunter (retiring)
Card: Whisper White, Handsome Hunter (retiring), & Regal Rose
Accessories: Split Pin
Tools: Circle Scallop Punch, Paper Crimper, Piercer (for brad), Big Shot & Little Leaves Die, and Adhesives.
Happy Birthday Annita (Grandma) xoxo
Here's the tutorial so you can give these flowers a go too!

1. Punch out 3 scallop circles
2. & 3. In order to make this type of flowers you need to break down the fibres in the cardstock. If you've got a crimper, simply put the scallops through the crimper several times in different directions. If you don't have a crimper simply jump to step 4.
4. Screw up the scallops (if you haven't crimped you'll probably have to scrumple, unscrumple, and scrumple again a few times).
5. What you're aiming to get is the cardstock starting to separate.
6. Gently pull apart the two halves. You'll end up with a soft textured side - almost like suede.
7. Repeat with all 3 scallops
8. Stack the 6 scallops textured size up and put a brad through the middle of all of them.
9. Screw up tight the first layer around the brad.
10. Repeat with all 6 layers.
11. Gently unfold each layer to your liking.
12. Add to card.
Have fun and feel free to email me a photo of your creations!